

Setup & config options
Suitable power supply
RasPi & sFTP file transfer
Home network print server
Home network scan server
Mesh : home Lan USB drive
Explore hard & software
UFW firewall explained
Secured by fail2ban server
Software packaging & PPA
Apache 2.4+ LAMP server
https web server : port 443
Varnish caching proxy
Module : cgi & perl
Module : geoip
Modules : php & mysql
http*s error handling
Server : conditional logging
TL-domain & dynamic DNS
Webalizer log analyser
Defeat referrer spam
robots.txt & xml sitemaps
Server : .htaccess handling
The game & not the islands
Setup & config options
North Atlantic : Macaronésia
🚫 No ads & tracking
![]()
![]()
![]()
![]()
![]()
The prologue
Most of the articles, descriptions and instructions written here are applicable to the most common Debian-based Linux derivatives. Depending on the respective operating system, there may be minor or major discrepancies.  This website is for educational purposes only. Please do not deploy anything in manufacturing plants.
No warranty or compensation is given for loss of data or hardware.
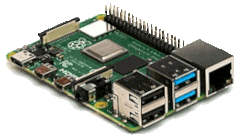
It should be also mentioned that this modest web server is hosted on a Raspberry Pi type 4B at home.
The Raspberry Pi mini-computer board as multi-purpose server deployed
A competent allrounder for domestic purposes and micro-enterprises
![]()
![]()
Raspberry Pi is a series of small single-board computers (SBCs) developed in the United Kingdom by the Raspberry Pi Foundation in association with Broadcom. The mini-computer with its armv7l processor has quickly become the favourite of hobbyists. Projects can be started with suitable Linux distributions. Even an aged RaspPi e.g. the models 2B and 2B+ can definitely serve to simple tasks quite well.
Caution Proprietary and untested third-party software sources (Linuxes) can threaten the system.
 Essential preliminary information | The socalled »headless mode«
A device in »headless mode« is a computer system that has been configured to operate without any display, keyboard, mouse etc. Headless systems are typically controlled over network connections. Thus reduces the amount of electrical energy and system resources - that has meant for the power consumption and as well as for the RAM installed - used.
Please note that here were all exercises under the socalled »headless mode« achieved.
Mesh layout | Headless SSH remote control
| Client (Home, W3) Desktop / Laptop | Via LAN or wLAN Home router / Mesh | Host (Server) Raspberry Pi / Or similar | ||
 | ⇄ |  | ⇄ |  |
Essential security update regarding SSH
At first, SSH will be disabled by default on Raspbian OS images.
SSH (Secure SHell) is a networking protocol which allows you to remotely log into a Linux computer and control it from a remote command line. As mentioned above, many Pi owners use it to install a Pi headless (without screen or keyboard) and control it from another PC.
In the past SSH was enabled by default, so people using their Pi headless could easily update their SD card to a new image. Switching SSH on or off has always required the use of »raspi-config« or the Raspberry Pi configuration application, but to access those, you need a screen and keyboard connected to the Pi itself, which is not the case in headless applications. So we’ve provided a simple mechanism for enabling SSH before an image is booted.
The boot partition on a Pi should be accessible from any machine with SD card reader, on Windows, Mac, or Linux.
If you want to enable SSH, all you need to do is to put an empty file called »ssh« without any file extension in the /boot/ directory.
When the Pi boots, it looks for this file; if it finds it, it enables SSH and then deletes the file. SSH can still be turned on or off from the Raspberry Pi configuration application or »raspi-config« This is simply an additional way to turn it on if you can’t easily run either of those applications.
Source ![]() The Raspberry Pi blog : A security update for Raspbian, Nov 2016
The Raspberry Pi blog : A security update for Raspbian, Nov 2016
Troubleshooting with newly created Raspbian OS image on (micro)SD card
A fresh OS image is written on the (micro)SD card and you can not copy an empty »ssh« file on it because an error says "write protected" or "read-only" ? Remove the (micro)SD card from the card reader slot or from wherever and reinsert.
24-Dec 2021
The intitial SSH login from the terminal / console
First we take the assumption, a fresh Raspian OS has been installed on the SD card. An empty file »ssh« (without any file extension) is in the directory /boot/ and your RaspPi has successfully booted.
After setting up a Raspberry Pi for the first time, it is difficult to establish a connection via SSH because the internal mesh address of the Raspberry Pi was assigned dynamically via DHCP and you do not yet know it.
- get access to the home (mesh) network router to obtain the internal mesh address
Regarding to this article the internal address 192.168.0.20 is deployed.
Default user : pi
Default user's password : raspberry
user@terminal:~ $ sudo su
user@terminal's password: ******
root@terminal:/home/user# ▁
Confirm the requested fingerprint by Y for all future logins.
root@terminal:/home/user# ssh pi@192.168.0.20
root@terminal:/home/user# pi@192.168.0.20's password: ******
root@raspberry:/home/pi# raspi-config
Change the standard password immediately.
29-Dec 2021