

Setup & config options
Suitable power supply
RasPi & sFTP file transfer
Home network print server
Home network scan server
Mesh : home Lan USB drive
Explore hard & software
UFW firewall explained
Secured by fail2ban server
Software packaging & PPA
Apache 2.4+ LAMP server
https web server : port 443
Varnish caching proxy
Module : cgi & perl
Module : geoip
Modules : php & mysql
http*s error handling
Server : conditional logging
TL-domain & dynamic DNS
Webalizer log analyser
Defeat referrer spam
robots.txt & xml sitemaps
Server : .htaccess handling
The game & not the islands
Setup & config options
North Atlantic : Macaronésia
🚫 No ads & tracking
![]()
![]()
![]()
![]()
![]()
The prologue
Most of the articles, descriptions and instructions written here are applicable to the most common Debian-based Linux derivatives. Depending on the respective operating system, there may be minor or major discrepancies.  This website is for educational purposes only. Please do not deploy anything in manufacturing plants.
No warranty or compensation is given for loss of data or hardware.
It should be also mentioned that this modest web server is hosted on a Raspberry Pi type 4B at home.
The Raspberry Pi mini-computer board as multi-purpose server deployed
A competent allrounder for domestic purposes and micro-enterprises
![]()
![]()
Raspberry Pi is a series of small single-board computers (SBCs) developed in the United Kingdom by the Raspberry Pi Foundation in association with Broadcom. The mini-computer with its armv7l processor has quickly become the favourite of hobbyists. Projects can be started with suitable Linux distributions. Even an aged RasPi e.g. the models 2B and 2B+ can definitely serve to simple tasks quite well.
Caution Proprietary and untested third-party software sources (Linuxes) can threaten the system.
Prologue
This description is valid for any Raspberry Pi with Debian, Raspbian operating system. It is also possible to use an old and small netbook or similar. I am mainly concerned in this manual / description about the use of computers with low power consumption in residential home networks and micro-enterprises.
If the main print device is not yet connected to the local network.
Raspberry Pi | CUPS Network print server for clients with Linux
CUPS, the Common Unix Printing System, is the most widely used printing system on Linux systems. Via CUPS, numerous printers can be used, managed and shared in the network, since it is designed as a client/server system. A computer with CUPS can serve as a print server for Linux and Windows machines in a network.
CUPS - as an important part of the operating system - is usually installed with the installation of all Ubuntu derivatives. The only exception is the Ubuntu server edition, but here you can install the packages via the package management.
Install CUPS on the client, e.g. your laptops, PCs etc. and install CUPS on the host machine - server.
user@client:~ $ sudo su
root@client:# apt install cups
pi@NetworkPrinter:~ $ sudo su
root@NetworkPrinter:# apt install cups
Functionality of CUPS
CUPS always converts the data to be printed into PostScript print data through so-called filters. These can then be sent to devices of the local CUPS instance as well as to other CUPS instances.
The instance that ultimately controls the printer must either convert the PostScript print data into device-specific print data through drivers or, if the device itself supports PostScript, send the data directly to it. For devices with PostScript support, the question of proprietary drivers and their availability for Linux does not even arise.
In both cases CUPS still needs a so-called .ppd file. This is a description of the printer's features. CUPS also comes with a generic .ppd that you can try if the manufacturer or the open source projects have not yet created a device-specific .ppd for exactly the model you want.
CUPS documentation
Wired setup
 Raspberry Pi ←→ Ethernet ←→ Hub / Modem / Router
Raspberry Pi ←→ USB ←→ Printer (with / without scanner)
Raspberry Pi operates as »headless« server : no monitor, no mouse device and no keyboard plugged.
For our case we have it to deal with my antique ![]() HP Deskjet All-In-One printer F4180.
HP Deskjet All-In-One printer F4180.
HPLIP | Hewlett Packard Linux Imaging and Printing
For HP peripherals only
HPLIP is a free and open source software package consisting of drivers and programs for printers and multifunction devices from Hewlett Packard. The HPLIP project supports over 2700 printer models, including Deskjet, Officejet, Photosmart, PSC (Print Scan Copy), Business Inkjet, LaserJet, Edgeline MFP and LaserJet MFP. HPLIP contains only device drivers and programs for configuration and maintenance of the devices, so that they can be transparently integrated into the system via the interfaces or protocols CUPS (for printing) and SANE (for scanner functions).
HPCUPS This package contains a CUPS-Raster-based printer driver which adds support for most inkjet printers and some LaserJet printers manufactured by Hewlett Packard. It does not provide PPDs for the fax functionality of Hewlett Packard's multi-function devices.
root@NetworkPrinter:# apt install hplip printer-driver-hpcups
Other Linux printer drivers | Support and download
07-Sep 2021
Updated 26-Nov 2021
Raspberry Pi with RasPian-OS Buster (Debian 10)
CUPS setup and configuration
Here the CUPS network configuration and printer setup via CUPS' own web interface or console is described, this is especially interesting for server systems without a graphical user interface - headless Raspberry Pi. Graphical desktop environments have configuration tools for setting up printers.
Preparatory work
Step-By-Step : connect your Raspberry Pi via LAN-cable (ethernet) to your local Hub, modem or router. Connect your Raspberry Pi via USB-cable to your printer. Switch on the printer then switch on (boot) the Raspberry Pi. Login.
pi@NetworkPrinter:~ $ sudo su
root@NetworkPrinter:# apt update && apt upgrade
Not needed, just in case. »rpi-update« is a command line application that will update your Raspberry Pi OS kernel and VideoCore firmware to the latest pre-release versions. WARNING: Pre-release versions of software are not guaranteed to work. Execute the command only as a last resort and be sure to make a backup of your important data.
root@NetworkPrinter:# rpi-update
If not done before, install the print server software CUPS on host (server) and client.
root@NetworkPrinter:# apt install cups
Add the »pi user« to the lpadmin group. That grants the »pi user« to access the administrative functions of CUPS. If you have an other username for the administrative functions then select his/her name.
root@NetworkPrinter:# usermod -a -G lpadmin pi
To ensure that CUPS runs on the home network and make it accessible across your whole (local) network.
root@NetworkPrinter:# cupsctl --remote-any
root@NetworkPrinter:# systemctl restart cups
Identify what your Raspberry Pi’s local IP Address is.
root@NetworkPrinter:# hostname -I
root@NetworkPrinter:# 192.168.0.27
So far, so good.
SAMBA for the Raspberry Pi network print server
SAMBA setup and configuration
SAMBA can act as a server to share data (folders, files, hard drives, CD drives, etc.) with other computers on the network. This is also called setting up shares. If there is an SMB version that can be activated automatically (i.e. without changing settings manually) on both the server and the client, the SAMBA server should appear on the (Windows or Linux) client in the network environment.
SAMBA can also be used to access shares of other computers as a client.
root@NetworkPrinter:# apt install samba
SAMBA configuration : everything should be OK if this is your first time you have installed SAMBA.
root@NetworkPrinter:# nano /etc/samba/smb.conf
        ...
        [printers]
           comment = All Printers
           browseable = no
           path = /var/spool/samba
           printable = yes
           guest ok = no
           read only = yes
           create mask = 0700

        # Windows clients look for this share name as a source of downloadable
        # printer drivers
        [print$]
           comment = Printer Drivers
           path = /var/lib/samba/printers
           browseable = yes
           read only = yes
           guest ok = no
        ...
Restart SAMBA to load in our new configuration, if needed.
root@NetworkPrinter:# systemctl restart smbd
SAMBA server has started ?
root@NetworkPrinter:# systemctl status smbd
	● smbd.service - SAMBA SMB Daemon
  Loaded: loaded (/lib/systemd/system/smbd.service; enabled; vendor preset: enabled)
  Active: active (running) since Sat 2020-10-10 19:59:35 CEST; 13s ago
    Docs: man:smbd(8)
          man:samba(7)
          man:smb.conf(5)
 Process: 5211 ExecStartPre=/usr/share/samba/update-apparmor-samba-profile (code=exi
Main PID: 5212 (smbd)
  Status: "smbd: ready to serve connections..."
   Tasks: 5 (limit: 995)
  CGroup: /system.slice/smbd.service
          ├─5212 /usr/sbin/smbd --foreground --no-process-group
          ├─5214 /usr/sbin/smbd --foreground --no-process-group
          ├─5215 /usr/sbin/smbd --foreground --no-process-group
          ├─5216 /usr/sbin/smbd --foreground --no-process-group
          └─5218 /usr/sbin/smbd --foreground --no-process-group
So far, so good.
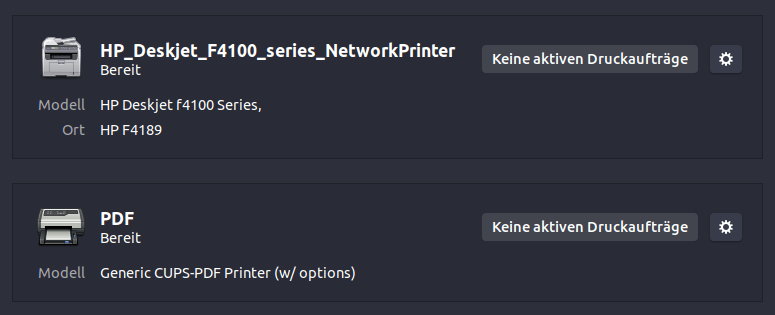
Add the home (local) printer to CUPS
You remember the local IP address ? Type the your personal IP address at port 631 in your favourite web browser. Example : http://192.168.0.27:631/
The CUPS administration page must appear in your web browser.
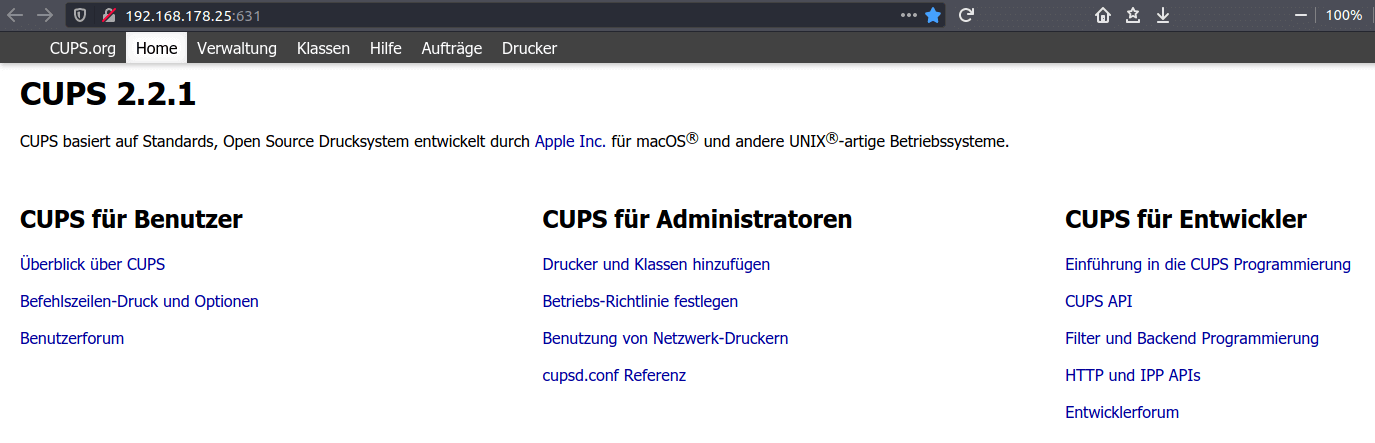
Image : CUPS' web interface in German language.
»Add Printer« & »Remove Printer« : CUPS asks for Raspberry's »sudo« username & password.
You are on the administration page, you have to click on the »Add Printer«. With the »Add Printer« page, you can select the printer you want to set up.
Select the model of your printer. CUPS tries and automatically detects the model and pick the correct device driver. Once you are confidental with everything and seems to be correct, click the »Add Printer« button.
Enable »Share This Printer«, otherwise other computers withing your home network are not be able to access it. Reboot your Raspberry Pi to get confirmed that everything is functioning.
root@NetworkPrinter:# shutdown -r now
Print a single test page.
07-Oct 2020
Updated 10-Oct 2020
Troubleshooting | SSL, http(s) and CUPS administration
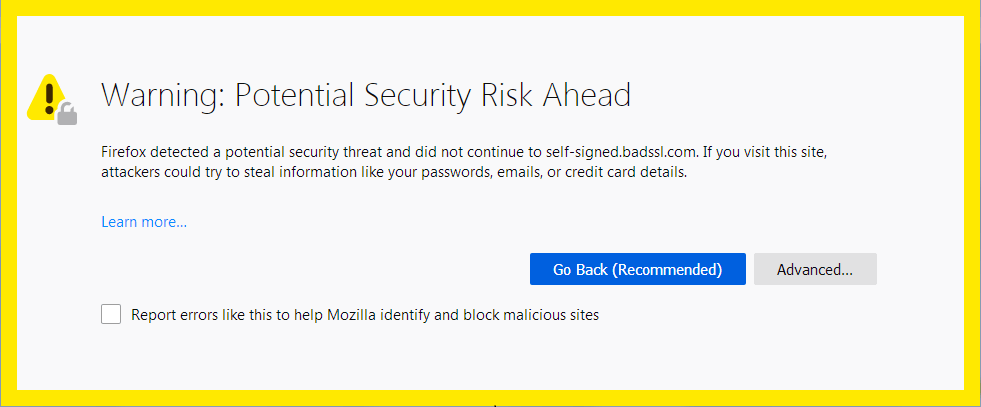
For administrative purposes CUPS requires SSL / https. You may encounter a warning page in your web browser. Just ignore it and move on (Advanced ...). Since we do not connect the printer to the World Wide Web, within the secured home network it has no dangerous potential.
07-Oct 2020
Clientside | CUPS PDF print service
CUPS-PDF is a backend for the print service CUPS. It is a program with a long tradition: up to and including Ubuntu 8.04 it was pre-installed as standard and was used to print documents in PDF format independently of the program. As of Ubuntu 8.10 it was replaced by the gtkprint function, which can directly generate a Postscript or PDF file, at least for GTK-based applications. To do this, the virtual printer "Print to file" is selected in the "Print" dialogue and the output format and name of the file are specified. Meanwhile KDE contains a corresponding function.
If you really want to create PDF files in all programs, you can still set up CUPS-PDF. In contrast to gtkprint, CUPS-PDF is also available in Java and Windows applications executed via Wine. It can also be used as a virtual printer in a paperless network if CUPS is allowed to make the locally available printers available to other clients.
root@client:# apt install printer-driver-cups-pdf
07-Oct 2020
Software bug ? | Printing of PDF file gets incomplete
Under certain circumstances it can happen that no background colours and pictures are printed from a PDF file, but only the plain text of the document.
07-Sep 2021